Adding badges, achievements, and other credentials to your own website is a great way to build online trust and credibility with prospective clients! Today, we’re going to show you how easy it is to embed your EventSource badges onto your website or blog. Please note: this tutorial assumes a working knowledge of HTML design/management.
Here are some step-by-step tips on how to add your badges onto your website. Let’s dive in!
Table of Contents
- Step 1: Locate and Copy your Badge Code
- Step 2: Paste your EventSource.ca Badge Code to your Website
Step 1: Locate and Copy your Badge Code
- Begin by logging in to your pro vendor dashboard and navigate to the “badges” section
- Select your desired badge (there could be colour swap options!)
- Copy the desired badge code to your clipboard
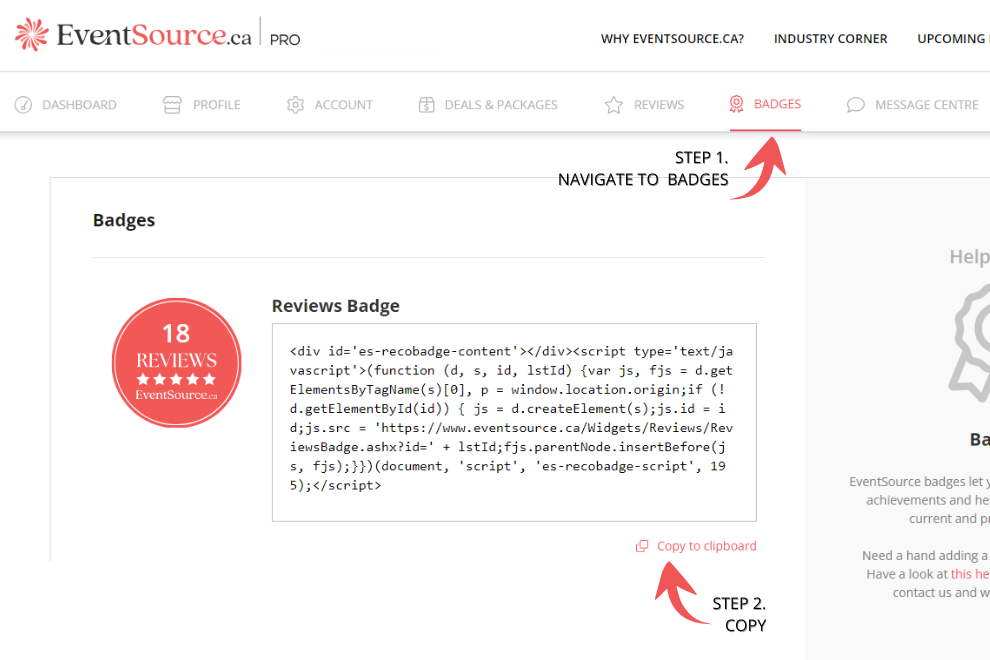
Great! You’ve successfully copied your code. Now all we need to do is copy it to your website.
Step 2: Paste your EventSource.ca Badge Code to your Website
If your website uses WordPress Classic Editor:
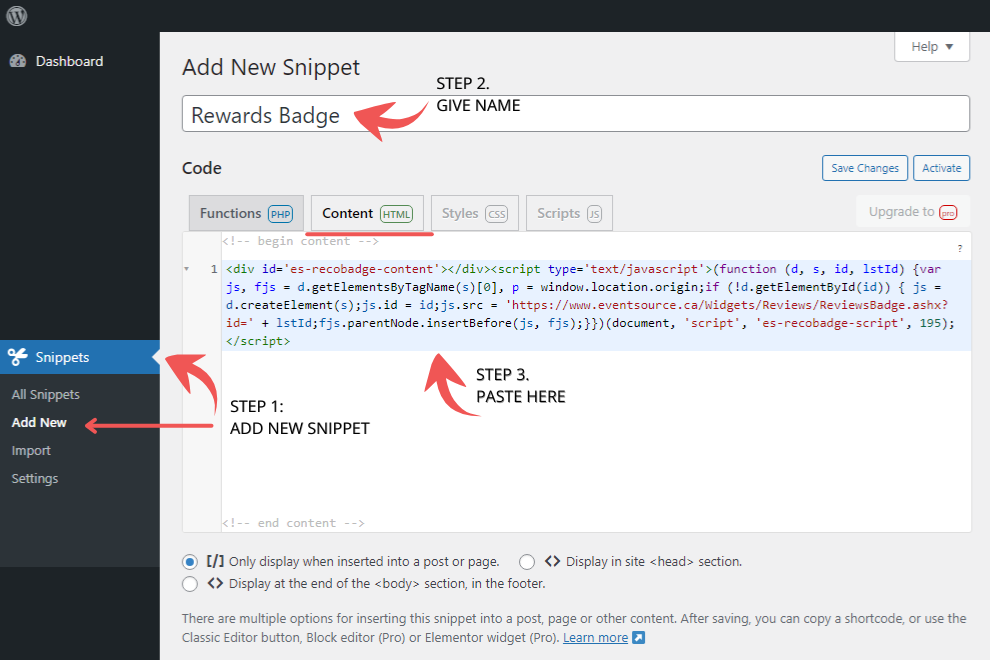
Since the Classic Editor does not allow direct insertion of script tags, follow the steps below to add the badge script safely and correctly using the “Insert HTML Snippet” plugin.
- Add a New HTML Snippet:
- In your WordPress dashboard, go to the left-hand menu and click on Snippets then Add New.
- On the right side, enter a title and paste your complete HTML + JavaScript code into the Content (HTML) field.
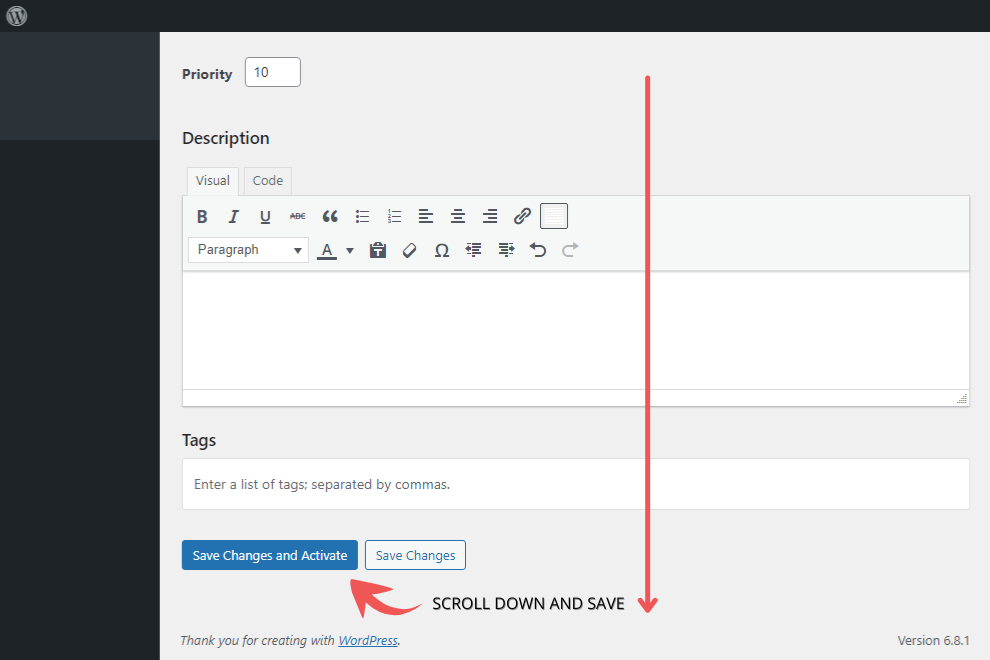
- Save and Activate the Snippet:
- Scroll down and click on Save Changes and Activate to make the snippet live.
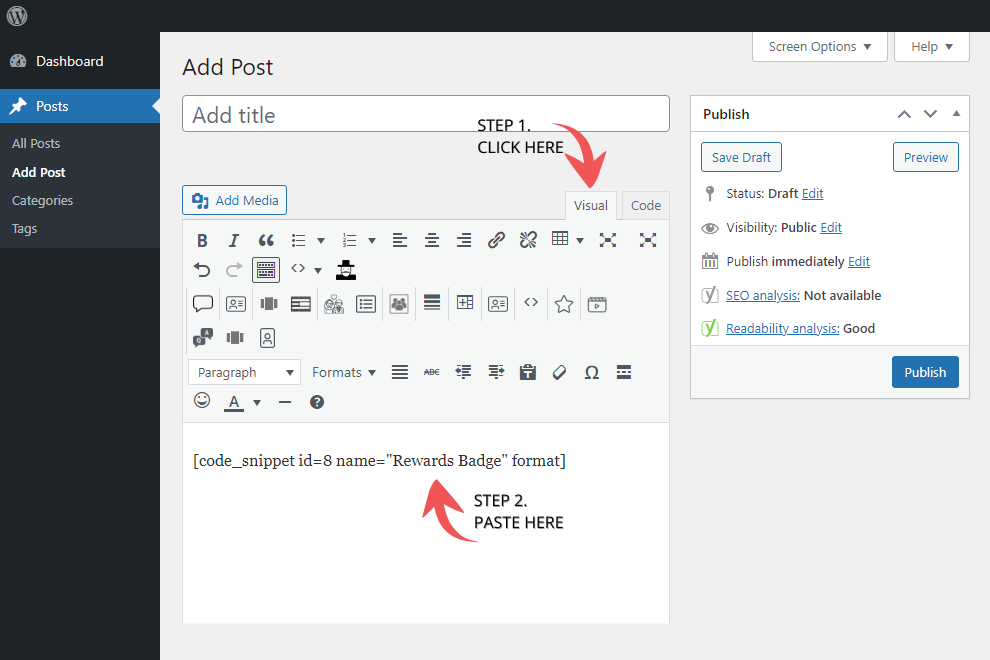
- Copy and Use the Generated Shortcode:
- Once the snippet is saved, the plugin will generate a shortcode.
- Copy this shortcode and paste it into the content of your post using the Classic Editor.

If your website uses WordPress Block Editor:
- Insert a Code Block
- Click the + icon to add a new block.
- In the search bar, type “Code” and select the Code block from the list.
- Alternatively, type /code directly into the editor and press Enter to insert the block.
- Add Your Code
- Click inside the newly added code block on CUSTOM HTML mode.
- Paste or type your code snippet. The block will preserve your formatting, including indentation and line breaks.
- Preview and Publish
- Use the Preview button to see how your code appears on the front end.
- Once satisfied, click Publish or Update to make your changes live.
Optional: Adjust the badge’s alignment
By default, the badge will align to the centre of the page as shown above. If you prefer to align it to the left or right, you’ll simply wrap the code with a <div style=text-align: tag as shown below.
Default (Centered – No Wrapper Needed):
<div id='es-recobadge-content'></div>
Left Aligned:
<div style="text-align:left"><div id='es-recobadge-content' style="display: inline-block;"></div></div>
Right Aligned:
<div style="text-align:right"><div id='es-recobadge-content' style="display: inline-block;"></div></div>
If your website uses a different CMS platform:
If your website uses a third party CMS (content management system), open the HTML source code for that page.
The general steps are:
- Login to your CMS backend
- Find the post/page/article to edit
- Find an icon that looks like
 or other similar action element to access the source code
 - Paste the badge code where you want to paste the Badge Code.
Here’s how the badge will appear on the frontend of your site:
Voila! You’re done and can now officially boast all the fruits of your labour. Still need a hand? Feel free to contact an EventSource team member!